I have a very nagging issue with the
cold drafty floor in front upstairs bedroom of my house which was built in
1969.
This is a 4-bedroom split-level house.
There are about 60 houses in my comunity, half of them have the same
design.
On a cold chilly night, the draft comes
from the built-in closet in the corner of the bedroom. I have stuffed the closet with sofa pillows to somewhat mitigate the draft
spreading across the floor.

I borrowed IR camera from a friend
and verified the source of air leaks -- the corner of the closet from
floor to the ceiling.

The T-intersection
that forms the frame of the closet's door also leaks the cold air.

Here is the view from the outside. The blue masking tape indicates the air leak spots.

Insulation
I called one of the most reputable insulation companies in the area seeking their advise and guidance. They came out and suggested to insulate the following areas:
- Attic (both sides of split-level roof)
- Basement
- Cold bedroom (interior)
- Pump closed-cell foam through the drilled holes in drywalls
- Cantileve of the cold bedroom
Cantilever
The insulation guys ripped open the cantilever's
soffit panels, cut through the plywood, and thus gained the access to
the subflooring of the bedroom. An old insulation was all scraped
and cleaned up. Then they installed 2" rigid board foamulars, ...

... and
sprayed over with closed cell urethane foam:

They filled the void with
R-19 faced fiberglass batts.


There was the air duct that comes out
along the bedroom ceiling right into the cantilever, makes an upward
turn and feeds the hot air into the register of the upstairs bedroom.

They sprayed the duct with the same closed cell foam.

For some reason, they did not touch the rightmost corner of the cantilever at all. However, later we verified that this part of cantilever is filled to the brim with the foam and is in fact insulated.

To the right you can see that the soffit was not touched or insulated:

Then the plywood and the soffit was restored
to its original location.

Closed-Cell Foam Interior Application
The insulators listened to my grievances over the cold drafty cantilevered bedroom and suggested to insulate the interior walls and the closet of the bedroom. They drilled 2" holes in the walls and filled the space between joists with Insulsmart foam.
Afterwards, we had to patch and repaint the interior walls and ceiling of the cold bedroom.
This, in retrospect, turned out to be the worst advice we got from our insulators as you would see below.
The foam squashed insulation bats that were already installed in the walls and, in addition, damaged the electric wiring. As you can see below, the insulators should have opened the outlet housing first and ensure that no foam could get to the wires.
In addition, an electrician theorized that the expanding foam inside the wall cavities might have pushed the wiring staples further into the joists thus breaking the old wires.

The diagnostics and resolution of this unfortunate side-effect of foam application was painfully slow. It took days calling the insulation company asking them to come back and inspect the situation. I had to call an electrician who investigated the problem and negotiated with the insulation company the terms of his engagement in the repair process. The pictures below illustrate the whole process. Starting from the left outlet, around the corned and into the right outlet which was the last one in the wiring chain:


Finally, the corner has been patched and ready for paint job:

This, in retrospect, turned out to be the worst advice we got from our insulators as you would see below.
Damaged Wiring by Closed-Cell Foam
The foam squashed insulation bats that were already installed in the walls and, in addition, damaged the electric wiring. As you can see below, the insulators should have opened the outlet housing first and ensure that no foam could get to the wires.
In addition, an electrician theorized that the expanding foam inside the wall cavities might have pushed the wiring staples further into the joists thus breaking the old wires.

The diagnostics and resolution of this unfortunate side-effect of foam application was painfully slow. It took days calling the insulation company asking them to come back and inspect the situation. I had to call an electrician who investigated the problem and negotiated with the insulation company the terms of his engagement in the repair process. The pictures below illustrate the whole process. Starting from the left outlet, around the corned and into the right outlet which was the last one in the wiring chain:


Finally, the corner has been patched and ready for paint job:

Review
All of that made very little difference to the cold drafty condition of the upstairs bedroom. On any given windy day, the temperature in the bedroom is 1F-1.5F degrees lower then the rest of the house. The air flow from the register (there are 2 in the room) is adequate. And the ceiling and walls are pretty well insulated by now.
Which leads me to believe that the air
leakage that is still present causes the room to cool down much
faster then it should.
I went back to the insulation company
and their explanation was that most likely the corners of my house were built in an conventional three-stud (2" x 6") formation
that leaves the isolated gap (or cavity) which is impossible to get
to from inside and properly insulate.

 Same goes for the T-intersection that form the
closet.
Same goes for the T-intersection that form the
closet.
Here are some of the modern techniques to build the corner of the house and avoid this problem alltogether:

Underfloor Gap
The insulation company representative later pointed out that another potential source of air leak might be the gap left between the underfloor of the bedroom and the rim joist. The way to handle the voids was to caulk the studs before installing the drywall.
This picture shows what should have been done by the original builder according to the insulation company.

Following on that tip, I invited a general contractor to come in and fill the gaps. This is how the cold closet looked like before and after the gap had been treated:
Cold closet -- northern corner:

Cold closet -- inner door corner:

Cold closet -- outside door corner:

Cold closet -- gaps patched:

Bedroom floor around ventilation duck patched:

Unfortunately, this effort again brought no difference whatsoever. The bedroom floor is still cold and the room temperature conditions have no improved.
Test-out
I used IR camera again to see if the air leaks were plugged after all.
The northern corner of the "cold" closet image shown little improvement.

The T-Instersection of the cold closet is still the problem:

And the outside of the house, the northern corner of the cold closet facing the camera:

As I have exhausted all the indoor options available to me, I shifted my focus to the outside in a hope to solve the problem with a different approach.
Insulating Northern Corner Siding
When the outside weather permitted a few warm days in the midst of an early spring, the contractor exposed the right siding of the cold bedroom to investigate the source of the air leak further.
This is the right wing of the bedroom's siding exposed. Behind the withered and darkened insulation is the closet's drywall. When the contractor removed the siding panels and cut through the Tyvek, he came upon a layer of old rusted clapboards applied to the framing without a layer of sheathing!

The northern corner of this segment of siding -- as you can see there is no insulation in the corner of the closet whatsoever:

The lower left corner illustrates how poorly this has been constructed to begin with:

The upper right corner connects with the roof. The traces of the closed-cell foam are visible in the right upper corner of the picture:

The contractor did not have the materials to replace the insulation bats. So, the empty wall caveties were sprayed with cell foam, and the area was patched with polyiso therma-sheathing insulation board instead.

This somewhat made the upper bedroom warmer, perhaps 10% warmer than it used to be.
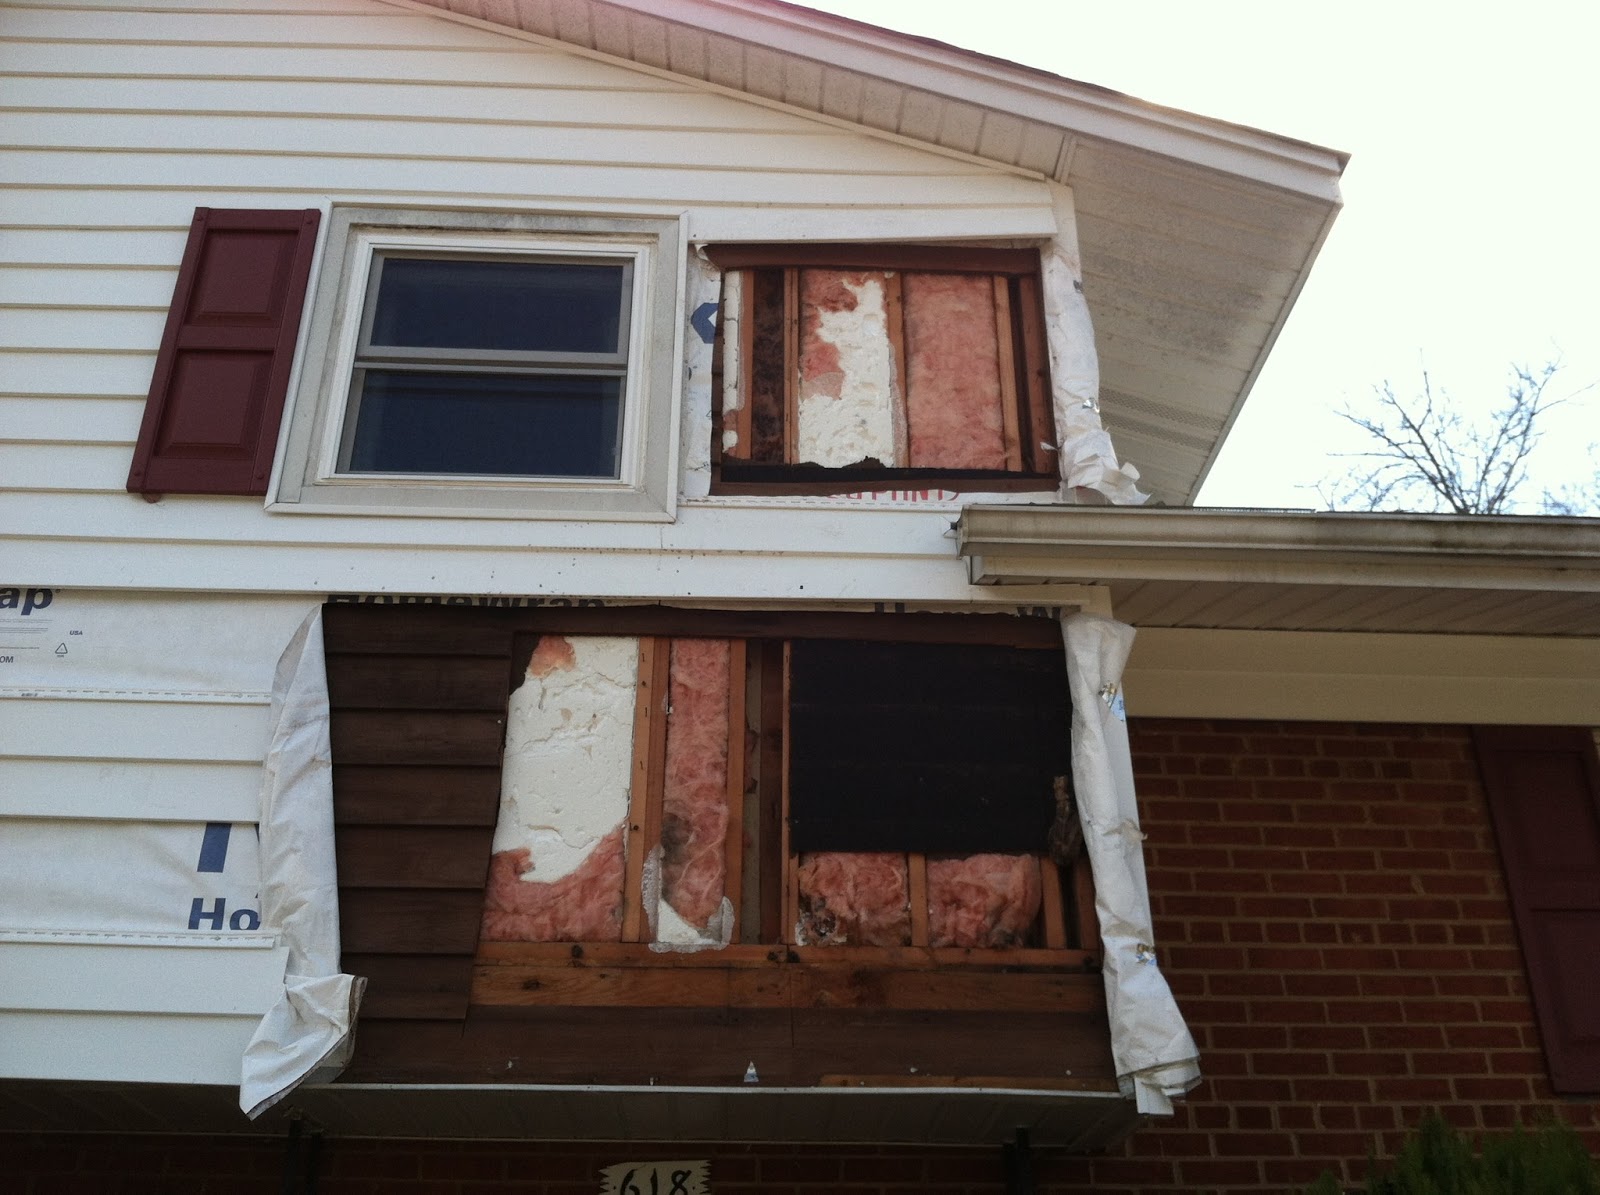
The last step that we have attempted to fix was to expose enough of the front siding that covers the closet space and its door.
When the siding was removed and Tyvek paper cut open and unrolled, we came upon the following wall composition:
Here you see the contractor pulling out one of the insulating pieces:

The lower part exposed -- you can see how the foam compressed the fiberglass insulation thus creating the pockets of void left wide open for cold to penetrate the wall:

The entire closet area is exposed now:

Unfortunately, the contractor had not anticipated the scope of the problem and did not have enough materials, tools, and most importantly the resources to properly address the problem. In addition, the weather conditions where still harsh on that day to have the insulation fixed the right way.
The siding is about to be put back together:

All of that have not made any difference so far. The cold bedroom is as cold as it used to be before I began my journey.
As I have noted before, pumping the closed-cell foam from inside was such a bad (and expensive) idea after all!
Although the internet is full of videos showing the foam being injected into the wall cavities that have fiberglass insulation compressing the batts against the wallboard or sheathing, most foam manufacturers do not recommend this practice.
The pour foam could bond to individual strands of fiberglass and tear it apart as it expands, creating voids.
So, after all these "improvements", I am back to my old setup, minus the bedroom lights and tons of time spent to patch and repaint the walls:

The lower left corner illustrates how poorly this has been constructed to begin with:

The upper right corner connects with the roof. The traces of the closed-cell foam are visible in the right upper corner of the picture:

The contractor did not have the materials to replace the insulation bats. So, the empty wall caveties were sprayed with cell foam, and the area was patched with polyiso therma-sheathing insulation board instead.

This somewhat made the upper bedroom warmer, perhaps 10% warmer than it used to be.
Front Siding Inspection
The last step that we have attempted to fix was to expose enough of the front siding that covers the closet space and its door.
When the siding was removed and Tyvek paper cut open and unrolled, we came upon the following wall composition:
- A stack of brown clapboards half an inch thick. They must have played a role of original siding.
- A layer of black building wrap. It looks like an asphalt-saturated building paper, 1/4 inch thick to seal out the moisture.
- The sheathing was missing. It simply was not there! The north-facing side of the house has no sheathing whatsoever!
- The old dirty insulating batts
Here you see the contractor pulling out one of the insulating pieces:

The lower part exposed -- you can see how the foam compressed the fiberglass insulation thus creating the pockets of void left wide open for cold to penetrate the wall:

The entire closet area is exposed now:
Unfortunately, the contractor had not anticipated the scope of the problem and did not have enough materials, tools, and most importantly the resources to properly address the problem. In addition, the weather conditions where still harsh on that day to have the insulation fixed the right way.
The siding is about to be put back together:

Conclusion
All of that have not made any difference so far. The cold bedroom is as cold as it used to be before I began my journey.
As I have noted before, pumping the closed-cell foam from inside was such a bad (and expensive) idea after all!
Although the internet is full of videos showing the foam being injected into the wall cavities that have fiberglass insulation compressing the batts against the wallboard or sheathing, most foam manufacturers do not recommend this practice.
The pour foam could bond to individual strands of fiberglass and tear it apart as it expands, creating voids.
So, after all these "improvements", I am back to my old setup, minus the bedroom lights and tons of time spent to patch and repaint the walls:
I would love to hear any suggestions that might help me improve the living conditions of my bedroom.
Hello, Vladislav
ReplyDeleteNice post, very detailed and clear. I was wondering if you were able to find a solution to your cold room/closet problem? If not, one thing you can possibly do to improve your comfort level in that bedroom is possibly using insulated siding or add a layer of insulation that is specially formed for siding, to add an extra layer of insulation. But the main part that will help the most is to insulate the corner of the closet. It looks to me that you are loosing heat from that corner, do to the un-insulated studs. If you go to this link http://buildipedia.com/aec-pros/construction-materials-and-methods/insulated-siding-part-1/ you can see there are siding corner with insulation that would slow down your heat transmission and therefore slow down the heat loss. I hope my suggestion works for you and hope to hear from you.
Oscar